Visual Radio Part 2: Automated Vision Mixing
So you want to get into visualised radio. Great! That’s what we’re doing, too.
This is a very beefy post. When I have more time, I’ll update it to include more detail and justification.
All the national stations have automatic vision mixing – so all their videos are automatically generated with a lot of complexity (and also with some huge license costs – commercial products are super expensive). How can we achieve this on the cheap, and with high quality?
Insanity worked on this last summer, using a cheap vision mixer and our existing analogue mixing desk (Sonifex S2) with no auxiliaries. Sadly I didn’t take any photos before writing the article, so it is just a big wall of text.
Our shopping list for this project includes:
- A Blackmagic ATEM switcher (you’ll see why this brand specifically later)
- Some cameras (we used Marshall CV500MB’s) – make sure they have a (stereo) audio input that works with its SDI output
- A server with a free USB port
- A joystick controller port (USB, in this case)
- Solder, some D-sub 9’s, XLR connectors, 3.5mm jacks, and lots of wire
I’ll assume you’ve set up all the cameras how you want them. We’ve used three – a wide angle, presenter side view, and guest side view.
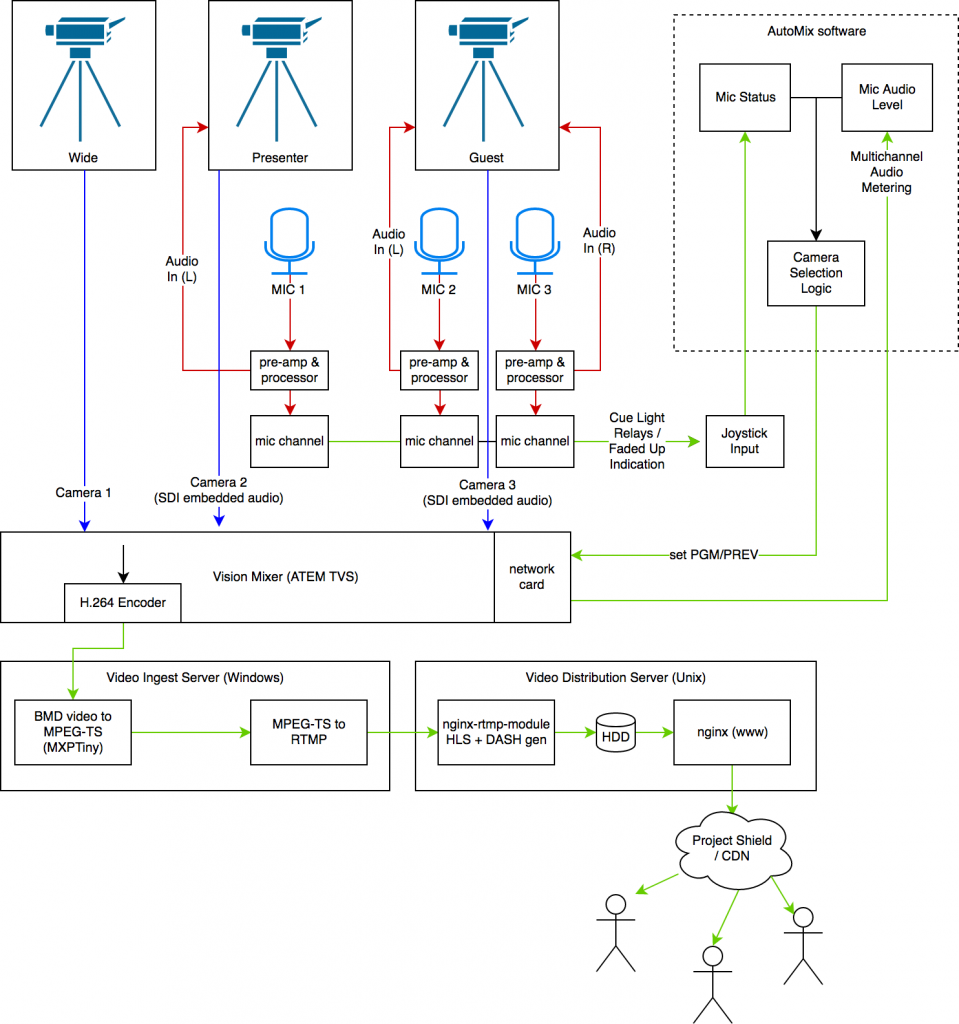
Here’s our full system diagram:

Firstly, we need to make some cables. For each microphone, a Y-splitter. We use this to split the return signal from the processor into two – one goes back to the desk, one is to go to the cameras. We’re not actually using the sound from the cameras, we’re just going to measure its levels, so using a Y splitter doesn’t actually impact the quality.
The next cable we need to make (one per “focused” camera) are an odd one – they are female XLR to 3.5mm jack (replace the 3.5mm with whatever inputs your cameras have). Leave the cold core in this cable completely disconnected – don’t pull it to ground like you normally would when balanced to unbalanced. As above, we don’t care about the audio quality going into the camera, and doing so won’t affect the audio return to your mixer. Connect it up neatly, and do a few sanity checks on your mics to make sure you have the wiring correct.
In our cameras, we had to adjust the audio setting so that it used the line input [from the 3.5mm jack]. The audio levels should then became visible in the ATEM mixer, pre-fade. Don’t turn the channels on. This being pre-fade doesn’t matter too much. As the 3.5mm jack is stereo, and (hopefully) our camera supports stereo audio, we can wire two microphones up to each camera to avoid having to use over-the-top mixing circuits or the like.
Note: to actually get audio directly out of the ATEM mix, we provided it a copy of our PGM from the distribution amplifier to make it happy – we don’t want to use the audio we’re getting from the mics as it’s pre-fade and hence always on, and also it sounds somewhat bad.
That’s great, but how do we monitor events like fader starts, and, most importantly, which microphones are live? The solution: a simple joystick controller.
We created some cables to connect the opto-isolated MIC CUE lights for each channel to the joystick port. This is very simple on the S2, as the cue lights behave exactly like virtual switches. The outputs on the S2 can be connected directly to buttons 1-4 on a joystick port. Make sure you get the polarity the correct way around, otherwise it’ll leave you scratching your head as to why it only sometimes works. Once you’ve made one for each channel, connect it to your joystick port, open up a test application (HTML5 Gamepad Tester is excellent for this), and knock a fader slightly to see if you have a connection. On the S2, we had to fit jumpers to the mic channels (Jumper 1) so that the cue light was latching and not momentary.
Boom! The ATEM can now see the camera audio levels, and our server can see what mics are live. Now, we need some software to tie it all together. Enter libatem.
We wrote libatem to address the alarming lack of ATEM APIs – there are a few existing ones but all in low level languages and designed for arduinos and other embedded devices. This is used in a simple Ruby script that combines it with RJoystick, a Ruby library for interfacing with joysticks on Linux. RJoystick only runs on Ruby < 2.2, as it hasn’t been updated in 6 years, so we used 2.0.0 on the server. If using CentOS or RHEL, update your kernel as only the most recent revision contains the correct drivers.
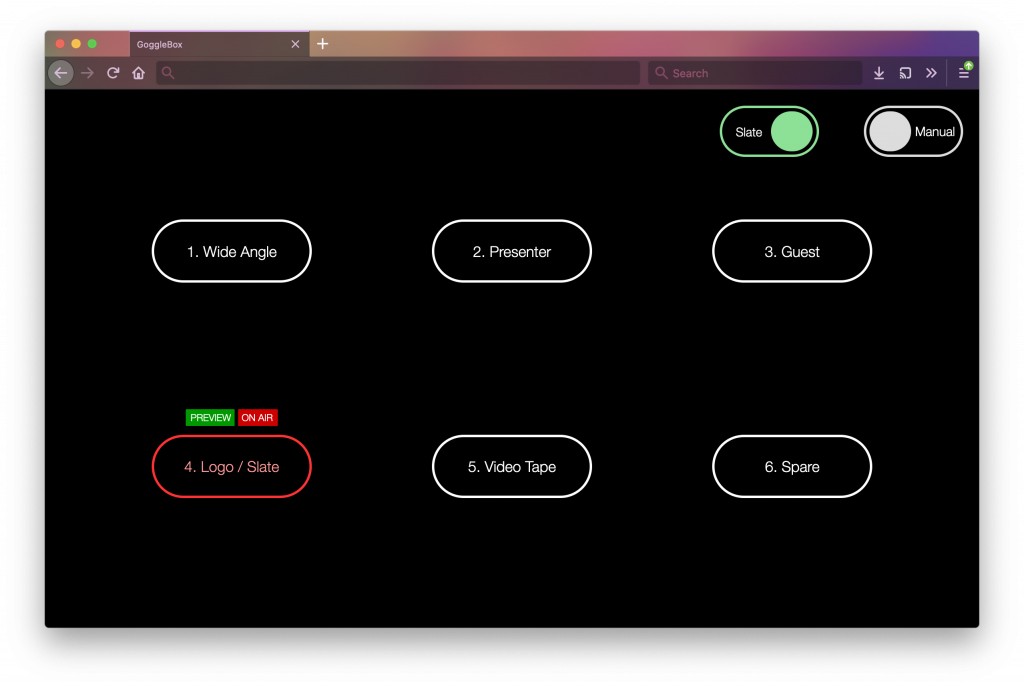
This is the software we use to tie it altogether. It mixes based somewhat on audio levels and die throws. It also responds in real-time to fader opening and closes. Of course, season to taste.

And there you go! Automatic, operator-less vision mixing, using regular video kit, and more kit we had lying around gathering dust.
